
The best sniping spots for Widowmaker on Blizzard World

The sniping spots on Blizzard World that all beginner and intermediate Widowmaker players should know. Learn the best places to contribute to the battle.
Check out all the articles in my series about the best sniping spots for Widowmaker:
Hybrid Maps
Assault Maps
Escort Maps
Aim is important, but positioning is the key to victory. As a sniper, having a good aim is indispensable, but knowing the positions from where to shoot without being seen makes the difference between life and death. I analyzed streams, videos, and pros gameplay to compile a list of the best and most used sniping spots.
Positioning when pushing, flanking, and in teamfight. We will have a look at the best placements to push, defend, take part in teamfight, and predict the movements of the enemy Widowmaker - both on offense and defense.
No Grapple shots. A Grapple shot is a scoped headshot performed in mid-air, using Grappling Hook to reach max height and “fly” momentarily. This article is thought for new or intermediate players, and I consider Grapple shots a mechanic for advanced ones. I might prepare a guide on them in the future.
Widowmaker duels. Depending on the situation, bodyshots and a correct use of your SMG (often underestimated) may be crucial, but when facing another Widowmaker you should always attempt to headshot her. We will study the best places to kill her while remaining concealed.
Keep moving. Thanks to Grappling Hook, Widowmaker is a relatively mobile hero - you should exploit this strength to rotate the spots and escape from flankers. Relying too much on the same location could be your ruin.
Note: even if I have explained some placements only from the perspective of the defenders or the attackers, you can use several of them for both purposes.
While explaining the spots, I might use some map callouts: List of all map callouts, and credit to their creators.
Beware from mobile. All pictures are optimized, but there are about 120 on this page.
First Point - Attack


Before the main doorway, Widowmaker can utilize the space around the two statues for cover.
Left side: you have a clear view on the high ground where the enemy Widowmaker and most of her team are usually positioned.


Right side: a portion of the gate and a very far away placement where the enemy sniper might be hidden (image 3).


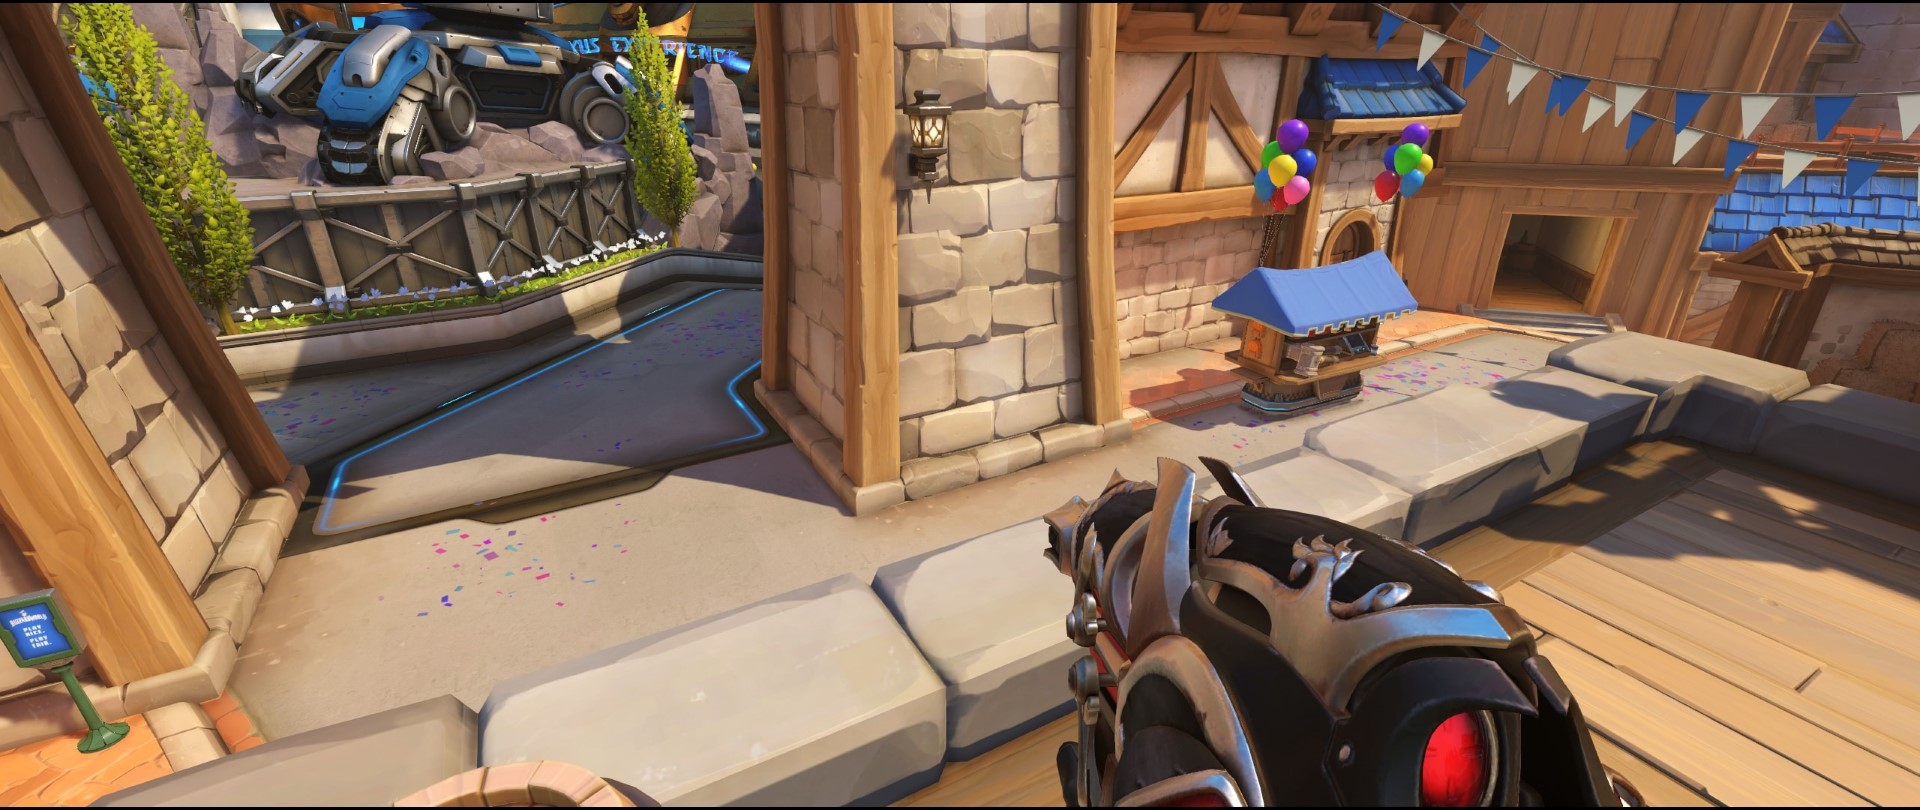
Similarly, you can attack from the pillars at the main gate.
Left side: a partial side-view on the high ground (image 3) and on another defensive Widowmaker spot (image 2).


Right side: attacking the high ground from this distance is a bit risky. The third image shows another possible placement for the enemy Widowmaker.


The Lost and Found Vikings is located next to the left statue at the main entrance. You can use this passage to flank the main high ground placement, get some kills, and cause chaos in the enemy lines.


I am not a fan of this statue, but you can use it both offensively and defensively as the legs provide some protection. Beware of the enemy Widowmaker who could be hidden near or behind the bench shown in the second image.
You can use this high ground as soon as the enemies retreat. It is a solid placement with an excellent view on the area around the point, and you can always escape elsewhere with your Grappling Hook as the map is very open.


The whole area on the left side features many possible sniping spots. There are several doors, pillars, and even some boxes you can use for cover while shooting at the opponents on the point.
It is preferable to the standard high ground position when facing Pharah as her missiles can’t reach you here.


The boxes in the first two pictures are awesome. I presented you only a possible angle, but moving to the left and the right you have access to the entire point, while remaining relatively safe behind them.
The last two images reveal a possible flanking spot. It is useful to kill the supports healing from a distance.
Do not forget to use your Grappling Hook to jump from a location to another - it will force the enemy team to waste several resources and time to chase you.
First Point - Defense


The main high ground placement. You have a good view on the entrance and the area below. Usually, your team will defend this spot with a shield-based hero, so you are relatively safe behind it.
Beware of the enemy flankers: the area is completely open, and the attackers can shoot at you from several positions.


The spots near the statue can be used to attack all opponents entering from the main gate.


The high ground near the boxes is convenient to snipe flankers disturbing your team on the high ground, or to retreat after you lose the previous position.
I presented you two possible angles, but moving to the left and the right of the boxes you will be able to maintain a line of sight on a wider area of the map while remaining protected.


You can defend the main road also from the ground level. The spot in the building is desirable when you are facing a Pharah. The structure is quite open and has a high ground area, so you can escape easily when engaged using your Grappling Hook.


The point (on the ground level or on the small building near the dock) possesses several spots to attack all opponents entering from the main gate.
Once your team loses the first area and retreats near the point, the enemy heroes coming from the spawn won’t expect to be killed from this distance.


In the first picture, you are behind the boxes at the right side of the point.
In the second one, you are on the stairs near the dock, and your body is almost completely sheltered by the small wall and the bench.
This is a frequently used long-range spot, but it works great as many players do not expect an attack from so far away - you are also very hard to hit behind cover.
While explaining the attack, I taught you several ways to counter this placement.


When the fight moves on the point, you can retreat to this area near the tank. It is a very safe placement with a partial vision on the point, but enough to contribute to the battle. If someone tries to kill you, just grapple away as there are many high ground areas near the tank.


A flanking route you can use to kill the supports.
Second Point - Attack
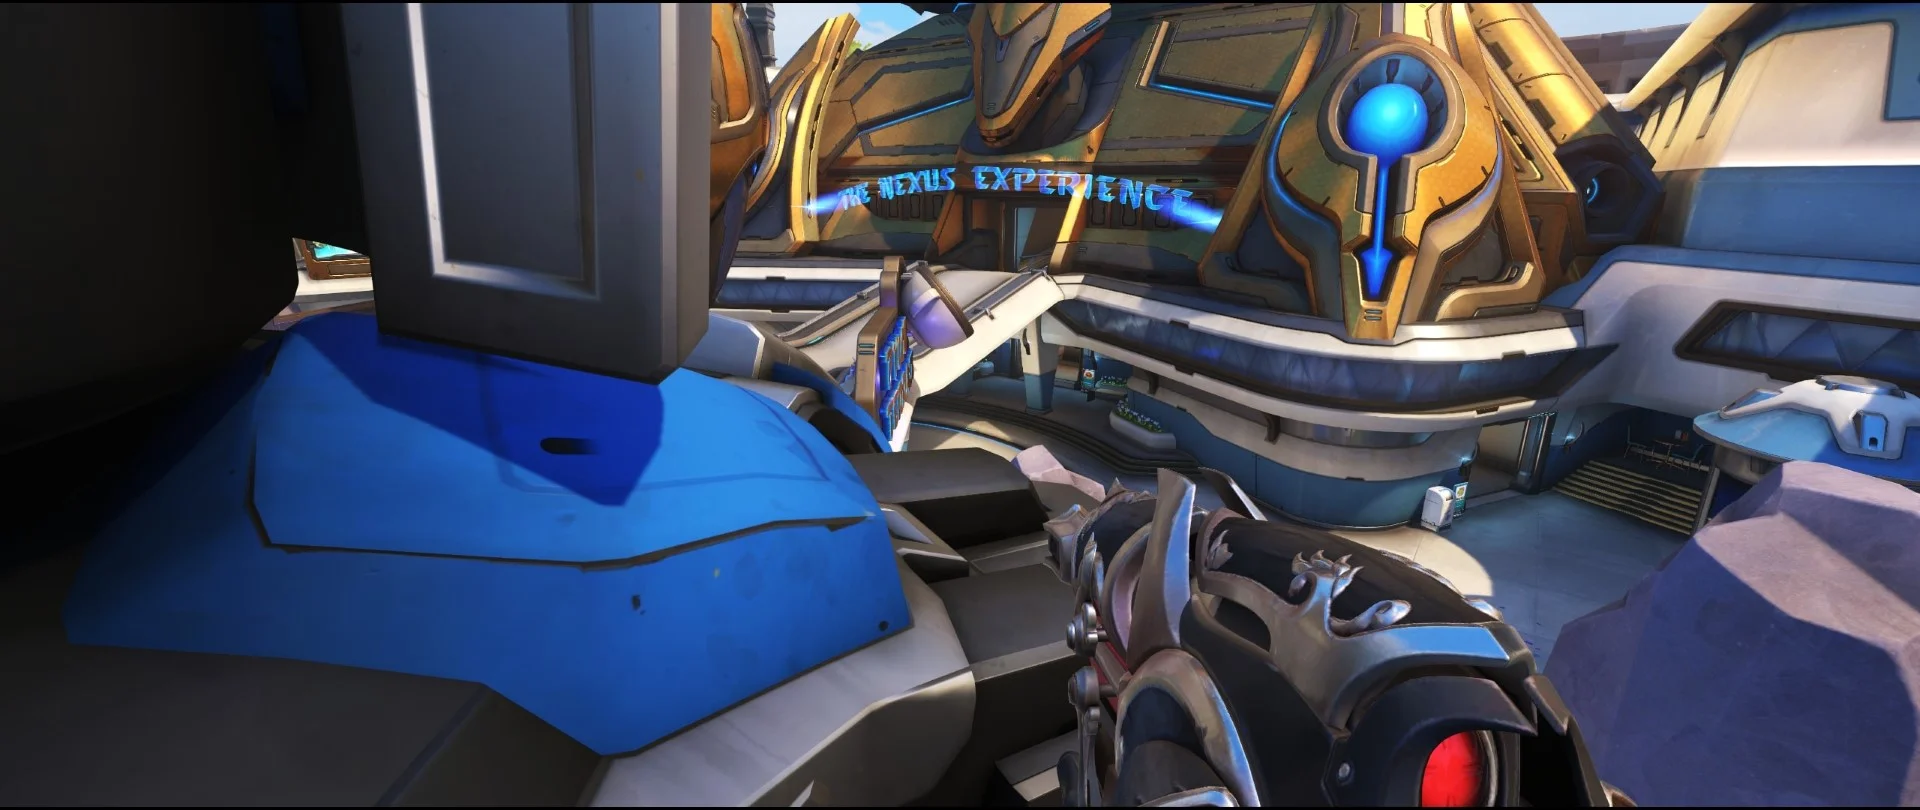


The high ground placements near the blue tank are outstanding as you can attack all the area below, the high ground, and the enemy spawn. The tank itself provides a solid cover, but it keeps moving, so you need a good aim to land your shots.
Launching the Grappling Hook you can reach the blue pipe (image 4) for a perfect vision on the enemy spawn and the final section of the road. Stay crouched whenever possible for maximum safety.


On the right side, this room is perfect while your team is pushing the payload. You can attack any enemy on the road and on the high ground.
The sign at the top of the Heroes Arcade in the second picture is a commonly used spot by the enemy Widowmaker.


Once the payload advances, you can move to this pillar to have a better coverage of the area.


Entering in the Heroes Arcade, you can access the final portion of the road. It is an enclosed space so many opponents might try to kill you, but you can always Grapple Shot to the upper floor for a quick escape route through the high ground.


An under-used spot at the left side of the tank. It is great to sniper supports and hitscan heroes while your team is fighting on the final portion of the point.
Beware of the enemy Widowmaker as she might be on the high ground behind the sign at the top right (image 2).
Second Point - Defense


The blue pipe can be used also defensively to kill the enemies pushing the payload near the door, and those coming out from the spawn.
You might employ this spot also while defending the first point, but honestly the vision is rather limited.


Basic but efficient places to defend the first segment of the road.
The first one (image 1) is also useful to contest the enemy Widowmaker and any opponent approaching from the high ground.
I love the position inside the Heroes Arcade (image 2) because it is the safest one, and you can always escape to the upper floor using the Grappling Hook. Just beware of possible flankers from the high ground, and try to kill them whenever possible.


Afterwards, I suggest to move on the Heroes Arcade. From the sign, you have a complete vision on the entire point.
Using the sign for cover (there is also another one on the right) you have access to several areas of the map while remaining relatively safe.


Moving to the right, you can reach the small shop on the ground level, which is useful to shoot at a section of the high ground, and protect your teammates engaged by flankers from Pylon Terrace.
On your right, there is a blue pipe from where you can defend several more locations: the main road on the left, the high ground area, and a tiny part of the road on the right.
Third Point - Attack


From the entrance, you can shoot at all enemies while your team is advancing in front of you.
Left side: the second section of the road. The enemy Widowmaker might be placed on the high ground, or behind the big pillar on the ground level.
Right side: you have access to two spots used by almost all Widowmaker on defense. I market them in red.


Moving in the room, you have again vision on the same Widowmaker spots I indicated before. Beware of heroes that might come from the door on the right (image 2).


Once the payload reaches the final point, you can flank the opponents (image 3) via the right side of the map, or reach the high ground (image 5) for a clear - but dangerous - vision on the point.
Bonus: there is a big health pack just below you.


The are many great spots for the attacker Widowmaker on the left side of the map.
The two high ground areas illustrated in these pictures are frequently used once the payload advances.


If the adversaries have a Pharah, or they keep attacking your location, you can use the placements near the bookshelf and the stairs. The vision they offer is a bit more limited, but your safety comes first.


On the ground level, the area in the first picture can be used to flank the opponents defending the first portion of the road.
The second and third pictures show the final corridor on the left side of the map. You have various spaces to attack the enemies on the point while using the big pillars for cover.
Third Point - Defense


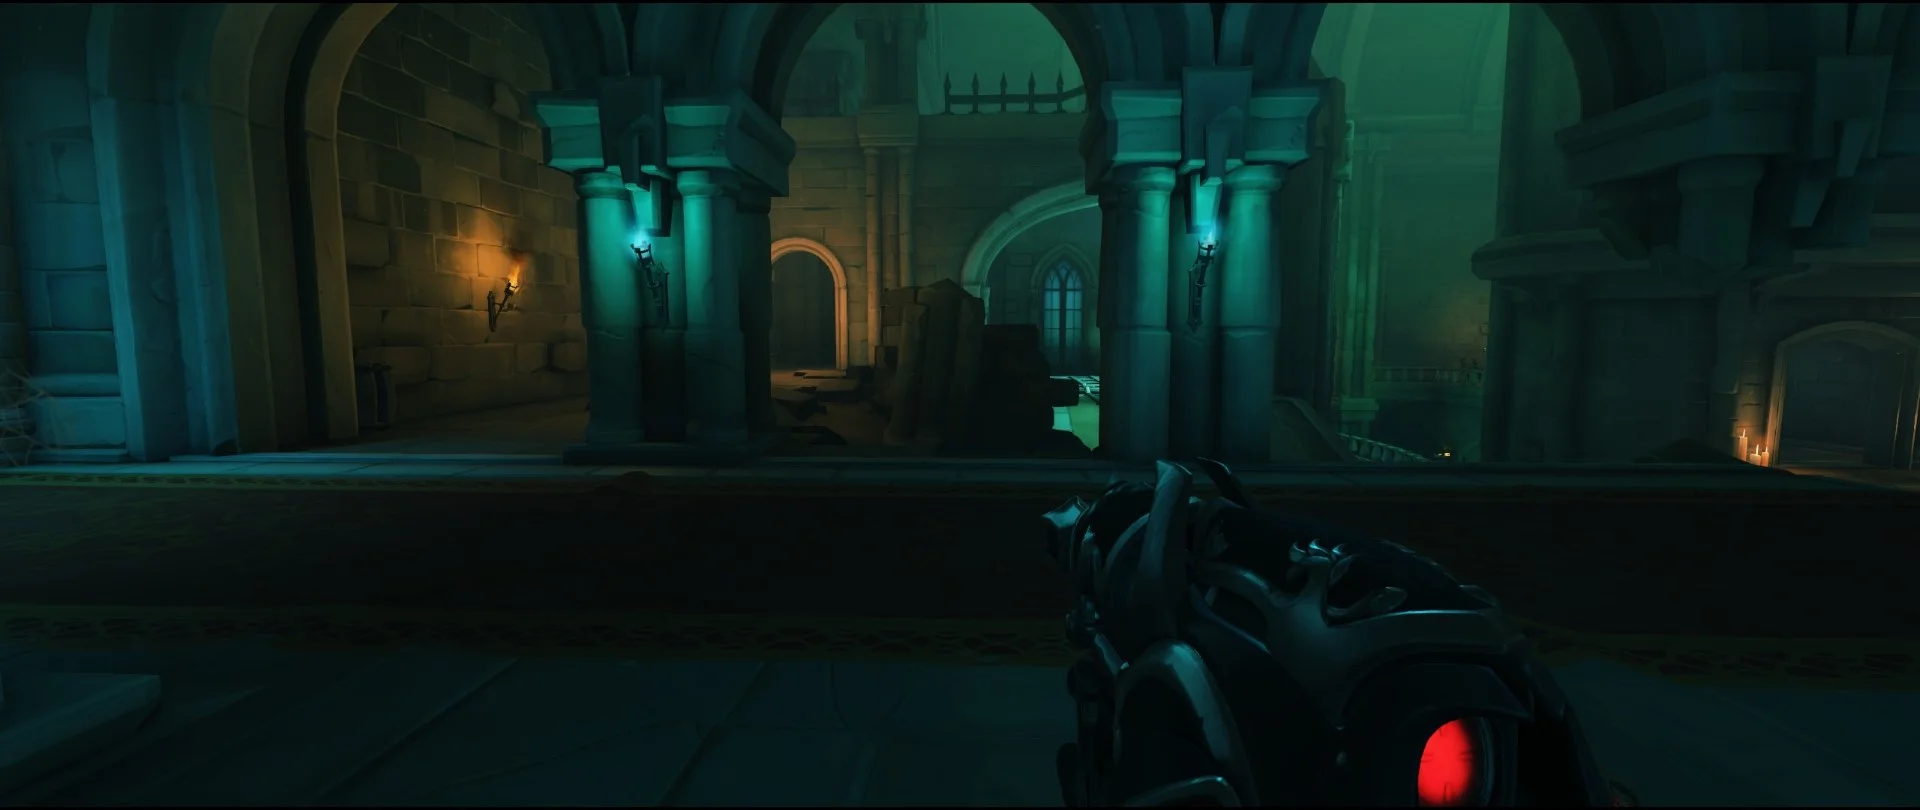
The basic and most used spot as the defender. From here, you can shoot at the opponents going out from the spawn (the big doors at the opposite side of the map), and protect the first segment of the road.


The left side (images 1 and 2) is also viable to defend the first area, and the big columns offer an excellent cover. Beware of the enemies that might attack you from the door on the left.
The right side (image 3) is really risky and might work just for a couple of kills if your team is contesting the area.


Afterwards, I suggest to move on the high ground, and exploit the pillars for protection.
The area on the ground level is very dangerous because the players coming from the spawn can easily flank you once they detect your position.


This broken wall is one of the best locations to defend the second area of the road.
I showed you several angles from where to attack the enemy Widowmaker (image 1), all players pushing the payload (image 2), and those entering from the gate (image 3). But, using the small wall and the pillars nearby, you can gain access to even more locations.
It is also very hard to get killed from this placement as you can always launch your Grappling Hook towards your spawn, and escape to safety.
Useful place to defend the last area of the point, but beware of possible flankers from the left side.