
Best Torbjorn turret placement spots on Eichenwalde

The best and safest turret spots on Eichenwalde that work even at high ranks. Play Torbjörn only where he is useful to the team and contributes to the victory.
Check out all the articles in my series about the best turret spots for Torbjörn:
Assault Maps
Escort Maps
Hybrid Maps
Not all maps work. Torbjörn is a truly particular hero that doesn’t work well in all maps, so I will only talk about those where he can be an effective pick.
Defense only. I am aware that in some maps he may work also when played on attack, but honestly I would recommend everyone to pick Torbjörn only when on defense.
You do not need a dedicated shield. When playing Torbjörn, you should be able to contribute without the necessity of a shield-based hero such as Orisa or Reinhardt protecting your turret. Do not complain in the team chat if your turret is destroyed.
Safe placements. The main goal of your turret is to survive and provide cover fire to protect a certain area of the map. Do not place it in an open field from where literally anyone in the enemy team could detect and destroy it.
I will illustrate the best locations for your turret considering the points above.
Beside these spots, there are other viable ones depending on your rank. At lower skill ratings people will often ignore your turret, but I want you to learn only the placements that will work even against experienced players. I did include also some risky spots, and explained in detail when you may consider them.
Eichenwalde
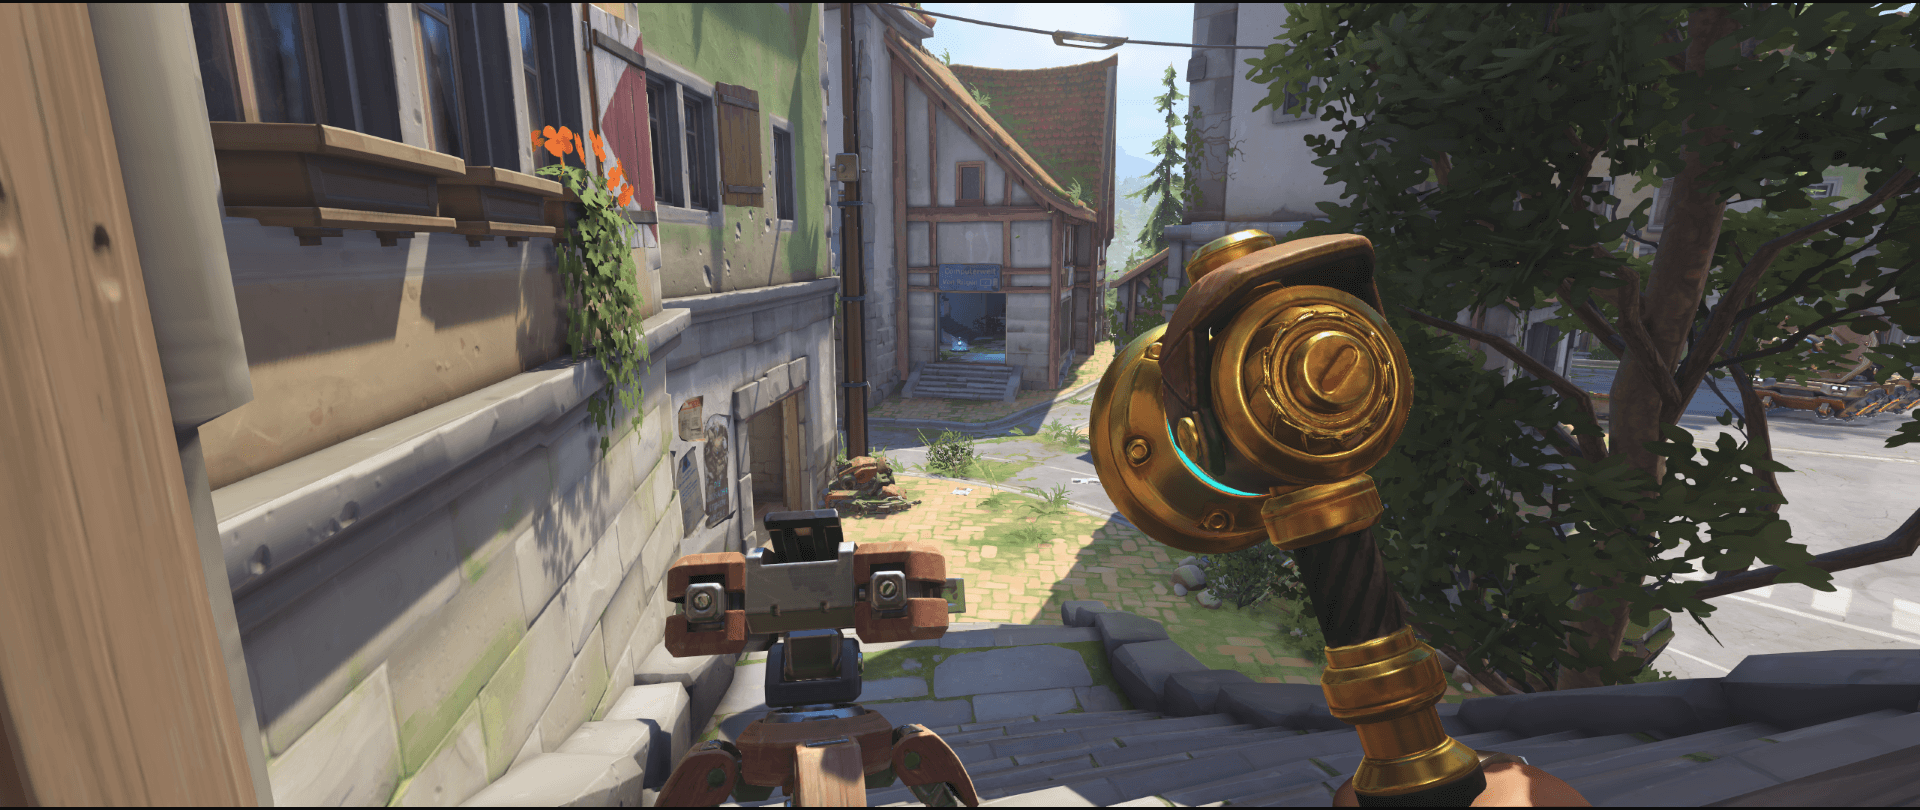
First Point

Before the start of the match, put the turret here to build up some ultimate charge. It will attack all enemies approaching the bridge, and you could even get a 30%+ charge if lucky.


A better placement for the primary charge turret! The enemies heading to the choke are barely able to notice it due to the slope (second image). Spot by BlueLightningTN.


A solid main location. You require practice to set this turret as there is just a tiny space where you can build on the broken car. If well-placed, it is very difficult to hit from the choke.
It covers the bridge and the point, but mostly it is an excellent anti-dive spot as this is the area that Pharahs and D.Vas regularly fly over when they want to go straight to the point. Spot by BlueLightningTN.

One of my most used spots. Enemies do not expect it, and it is immensely safer than the placement next to the car used by most Torbjorn players at lower ranks.
The turret can’t shoot down the heroes outside the choke, but will engage those that dare to enter, and even provide cover on the point.
An alternative to the previous location. It protects the entire area past the bridge, helping the team also against flankers. If you have two solid tanks holding the choke, this turret can last for long and do a marvelous job.
Placing the turret a bit behind - inside the building - grants you a safer spot from where to repair it, but will also limit its attack range.

A very safe spot with a limited field of view. Use it if your team lost the choke and is currently fighting on the point - the turret will contribute while staying away from danger. It is also useful against dive comps that keep pressing on the point.


Fall back defense position to protect the point. The stairs shelter and hide the turret (second image). Beware of flankers from the right side. Spot by BlueLightningTN.

If the turret is constantly destroyed by Pharah, just place it inside this building. It covers a good portion of the point and won’t be destroyed easily as long as your team is alive.
Widowmaker can deal with it from long range if your team isn’t blocking her path. Beware of flankers from the right side.
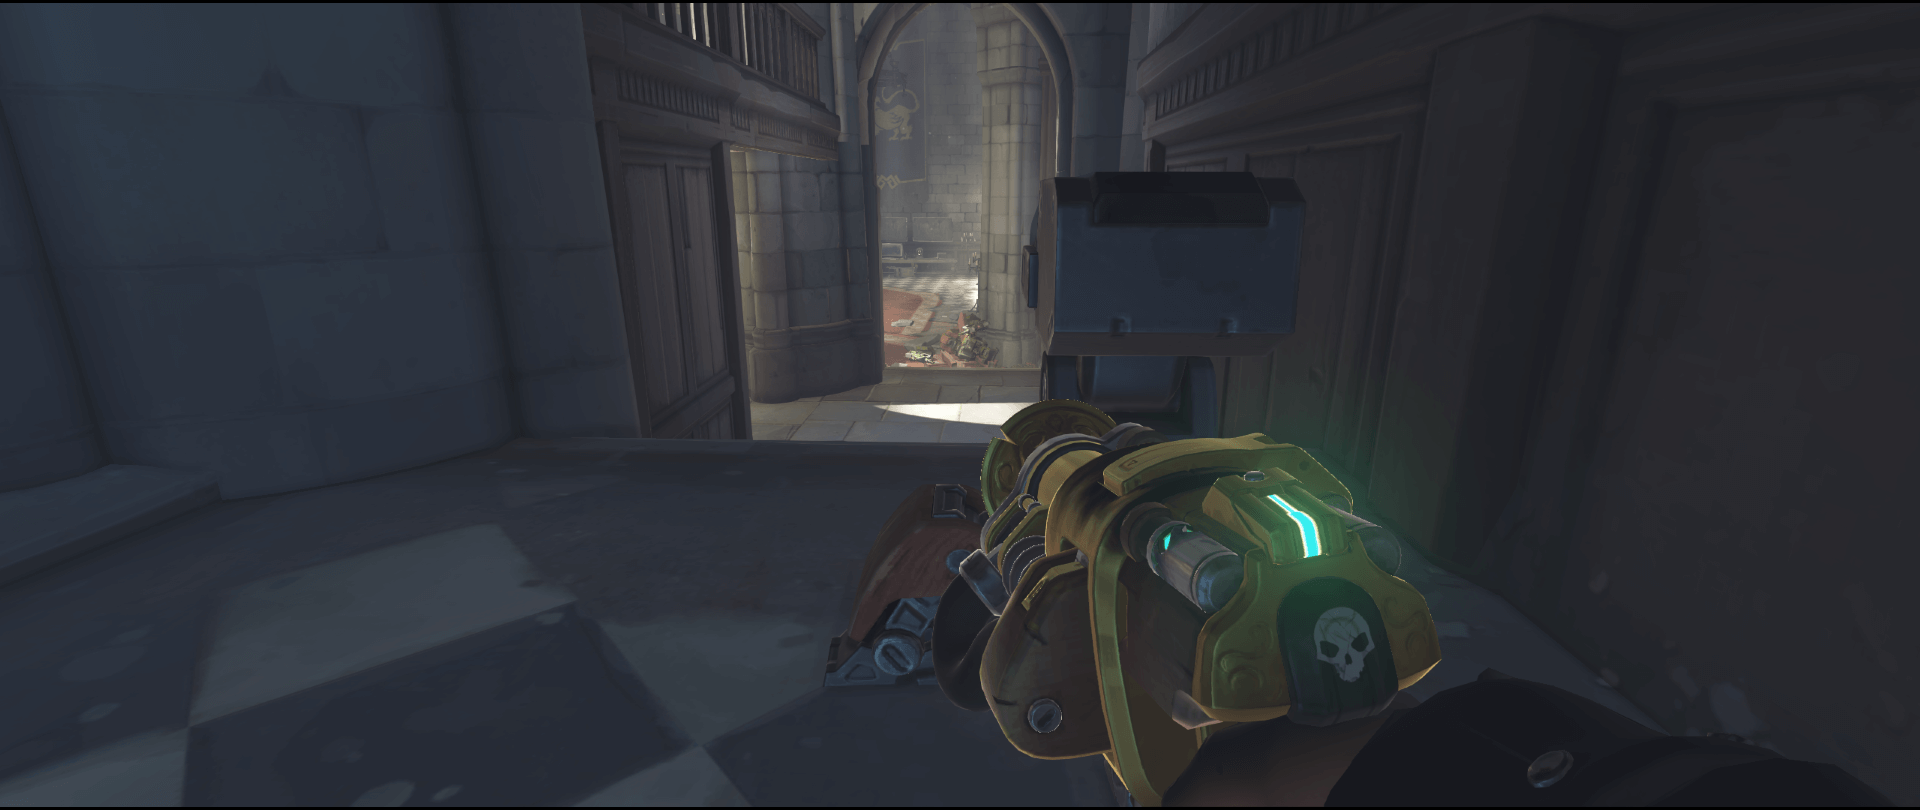
Second Point
The high ground area on the castle walls is amazing, but the enemies will immediately demolish your turret there once it is spotted. Do not place it there.

This turret shoots at the choke and the high ground area. It is barely visible to the opponents and extremely difficult to damage with a frontal attack. Beware of long-range attackers from the other side of the bridge as they are outside your turret range. Spot by BlueLightningTN

This position has an ample vision on the bridge and protects your supports. The bush partially hides the turret.
It works great while your teammates are holding the choke or if the teams are battling in the area. It can easily stop an assault if your ultimate is charged up. Flankers can quickly reach you from behind once the position is known. Spot by BlueLightningTN.

I like this placement because it protects your back-line while the team is holding the choke. It has a limited field of view, but is rather hard to destroy. Flankers from the right are your main issue, if they find out where the turret is located.


No one uses this bridge or expects a turret here, so it will be rather safe. It has a narrow field of view but can shoot at the adversaries on the main bridge. The turret is also quite hard to spot (second image). Spot by BlueLightningTN.

This spot can work for a surprise attack, if the enemies are rushing the point and no one is holding the high ground. A good Molten Core may annihilate them from behind.
Third Point

I only alternate between these two spots. They cover only about a half of the final road each, but are extremely safe - even expert flankers will have a hard time getting them. Usually, the enemy team can destroy your turret only after your entire team is overwhelmed.
Do not put the turret on the balcony: it offers a great view of the hall, but it can be killed too easily by long-range attacks.
Header image: Blizzard