How to increase FPS in Fortnite: Video options and GameUserSettings

The video options and GameUserSettings.ini file of Fortnite can be optimized to increase your FPS and improve your gameplay.
On the web, you can find several configuration files to replace yours and boost the fps. Honestly, I don’t like this approach because I want to know exactly what I am changing, so I decided to review all the options in this article.
These adjustments are useful if you are struggling to reach an acceptable amount of fps as you are using a low-spec PC, but also if you have a monitor with a high refresh-rate as you bought it to gain an edge in a competitive shooter such as Fortnite.
In-game settings
Launch Fortnite, click the Menu icon on the top right, select Settings, and open the Video tab. I will show you how to set up each option for maximum performance.
Video
Window Mode: Fullscreen.
Full Screen is the best choice performance-wise, but you might prefer Windowed Fullscreen if you have a multi-monitor setup and you wish to move quickly on another display.
Note: you can switch from Full Screen to Borderless Window by pressing Alt+Enter on the keyboard.
Display resolution: use your native one.
Using your native resolution is desirable for a better view, but if you badly need a performance boost, decreasing the resolution will greatly improve your fps. 720p is usually a solid compromise between quality and performance.
Frame Rate Limit: your monitor refresh rate.
This is the fps cap. I suggest keeping it at the same value as your monitor refresh rate (60, 120, or 144Hz).
Note that unlocking the frame rate might cause overheating problems if your system isn’t cooled properly as the game will try to render as many frames as possible.
Quality: this setting doesn’t matter because we will edit manually the other options.
3D Resolution: 100%.
I warmly recommend to not change this setting unless you really need more fps. Decreasing the value below 100% will grant more performance at the cost of blurred textures.
The visual effect at 90% is acceptable, and 75% is the minimum value you should consider. Generally, decrease the resolution first, and use the resolution scale as the last resort.
View Distance: Far.
The View Distance setting doesn’t affect player models, but only regular objects such as chests, loot, planes, rifts, etc. I recommend keeping it at Far as otherwise you will miss or delay crucial information compared to other players.
Some players also noticed fps drops and stuttering with low View Distance values because the graphic engine spends extra time showing/hiding objects.
Shadows: Off.
Anti-Aliasing: Off.
Shadows and Anti-Aliasing have a big impact on the FPS.
Textures: Medium or High.
This setting depends mostly on the VRAM available on your graphic card. Be aware that any value past medium might have an impact on the fps.
You can reduce Textures further, but I suggest keeping it at Medium or High for a better viewing experience.
Effects: Low.
Post Processing: Low.
These settings create visual effects on your screen that do not influence negatively only your performance but also your gameplay, so I suggest disabling them.
Vsync: Off.
Motion Blur: Off
Allow Multithreaded Rendering: On.
There is no reason to disable this option as it allows the game to use more cores of your CPU.
This is all. Apply the changes.
GameUserSettings.ini file
In the past, you could tweak several .ini files to increase your fps, change the Field of View, and eventually gain an advantage over the other players.
Over a year ago (in patch 1.7.2, released on October 17th, 2017) the developers decided to ban all the custom game modifications.
Only the settings in GameUserSettings.ini (resolution, window mode, etc...) are meant to be modifiable, and they are all exposed in the Options menu anyways.
Being able to modify other ini files was not intended and is addressed in the upcoming 1.7.2 patch.
— Michael Noland - Lead Programmer at Epic Games
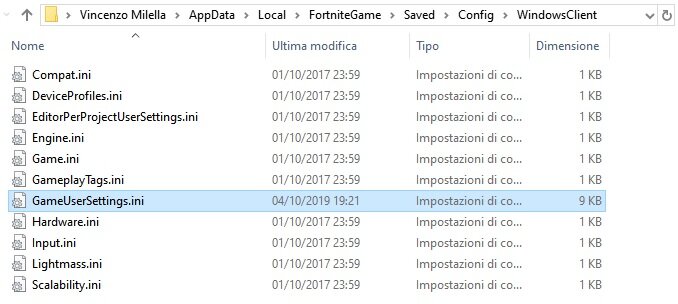
The GameUserSettings file is still editable, but it contains only the options already available in-game, so I won’t explain them. To find the file, press Win+R and then input the following line:
%USERPROFILE%\AppData\Local\FortniteGame/Saved/Config/WindowsClientGameUserSettings.ini path
If you decide to edit it manually, don’t forget to put it on read-only once you finish:
Right click on the file, go on Properties, General, Attributes, and mark it as Read-Only. If you don’t, it will be overwritten as soon as you start the game, and you will lose all the changes.
If you need to alter your in-game settings in the future, it is necessary to uncheck read-only. Afterwards, you can change the settings, edit manually GameUserSettings.ini, and set it as read-only again.
If your GameUserSettings file becomes corrupted, just delete or move it elsewhere, and then open the Epic Games launcher, go on the Library tab, find Fortnite and left-click on the three dots on the right, and click Verify. The game will automatically download a new default one.
More Fortnite articles:
Header image: Epic Games


