
The best sniping spots for Widowmaker on Watchpoint: Gibraltar

The sniping spots on Watchpoint: Gibraltar that all beginner and intermediate Widowmaker players should know. Learn the best places to contribute to the battle.
Check out all the articles in my series about the best sniping spots for Widowmaker:
Hybrid Maps
Assault Maps
Escort Maps
Aim is important, but positioning is the key to victory. As a sniper, having a good aim is indispensable, but knowing the positions from where to shoot without being seen makes the difference between life and death. I analyzed streams, videos, and pros gameplay to compile a list of the best and most used sniping spots.
Positioning when pushing, flanking, and in teamfight. We will have a look at the best placements to push, defend, take part in teamfight, and predict the movements of the enemy Widowmaker - both on offense and defense.
No Grapple shots. A Grapple shot is a scoped headshot performed in mid-air, using Grappling Hook to reach max height and “fly” momentarily. This article is thought for new or intermediate players, and I consider Grapple shots a mechanic for advanced ones. I might prepare a guide on them in the future.
Widowmaker duels. Depending on the situation, bodyshots and a correct use of your SMG (often underestimated) may be crucial, but when facing another Widowmaker you should always attempt to headshot her. We will study the best places to kill her while remaining concealed.
Keep moving. Thanks to Grappling Hook, Widowmaker is a relatively mobile hero - you should exploit this strength to rotate the spots and escape from flankers. Relying too much on the same location could be your ruin.
Note: even if I have explained some placements only from the perspective of the defenders or the attackers, you can use several of them for both purposes.
While explaining the spots, I might use some map callouts: List of all map callouts, and credit to their creators.
Beware from mobile. All pictures are optimized, but there are about 120 on this page.
First Point - Attack
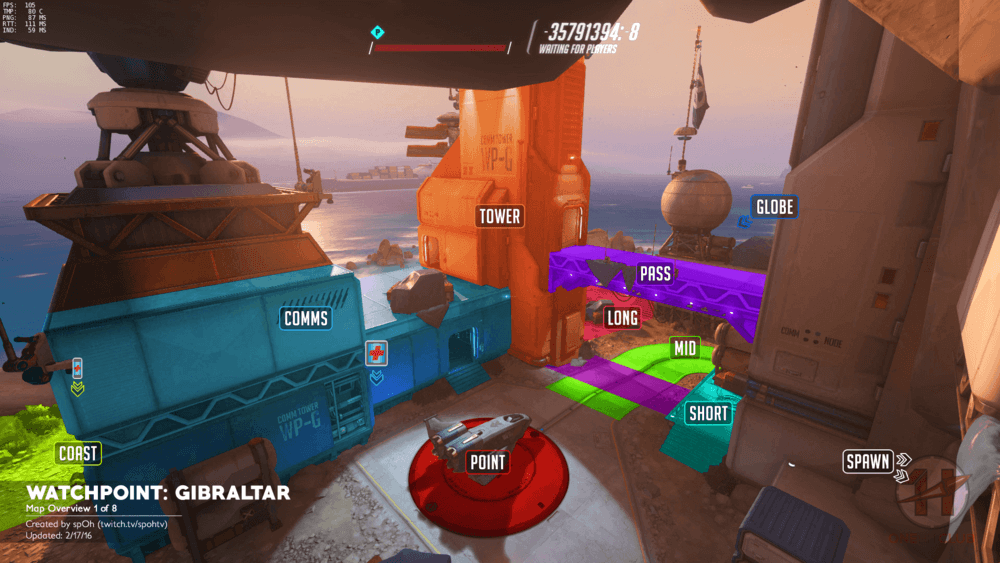


The area just outside the spawn has a few spots you can use for cover.


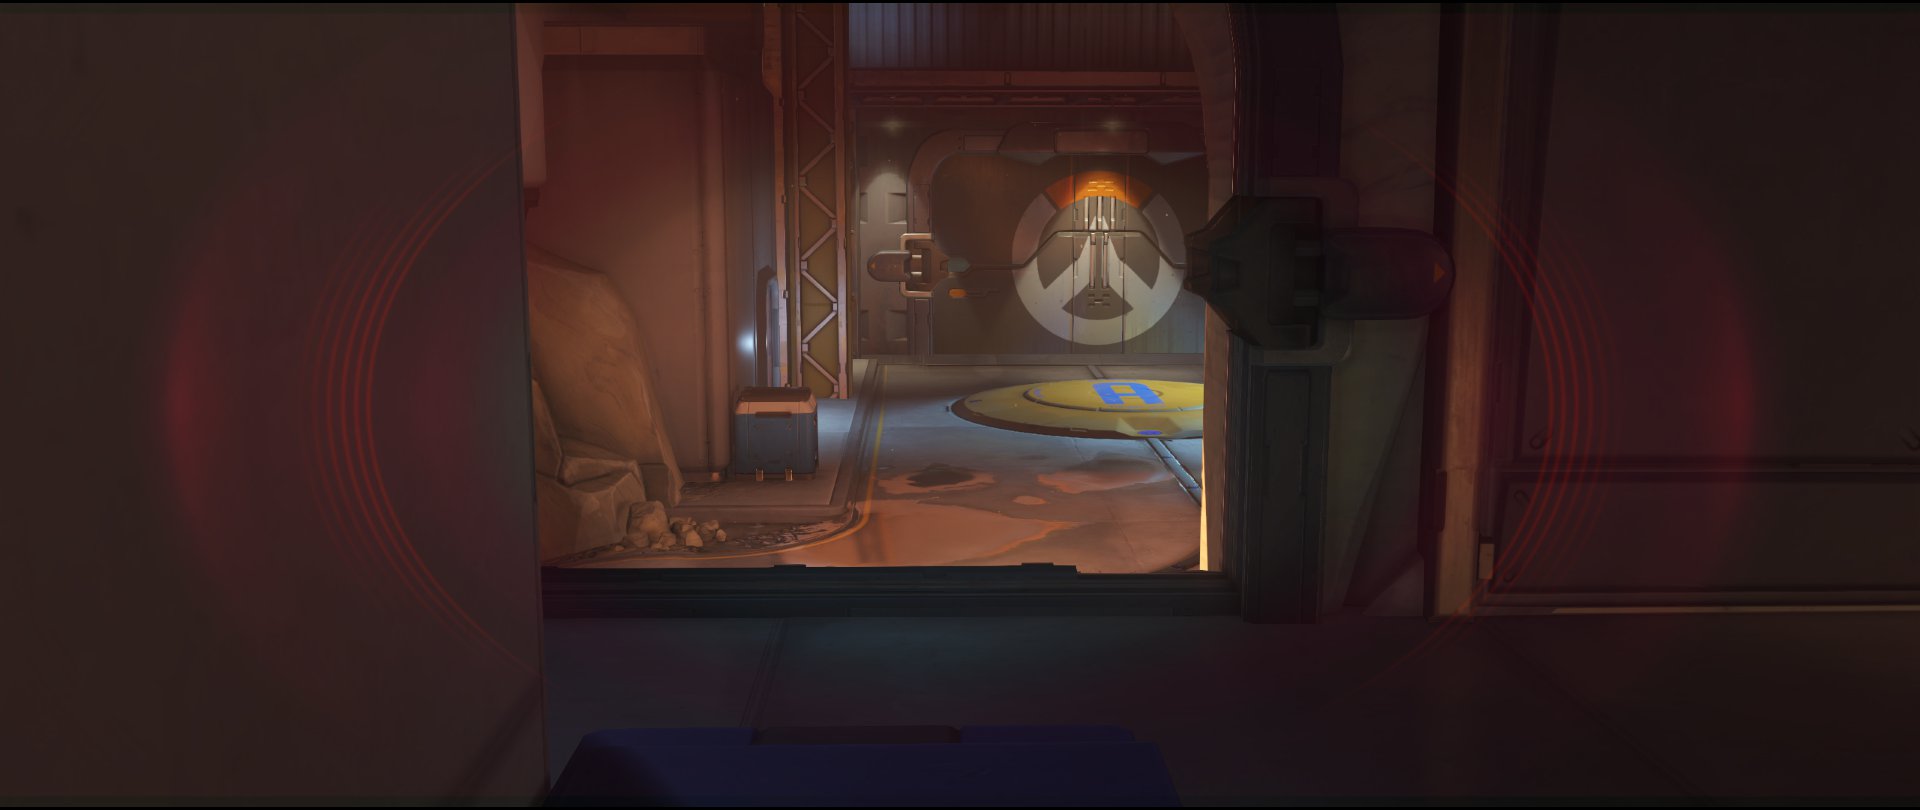
The box on the right gives access to Long (image 1).
The packages on the left provide you a good view on the road and on the main high ground where most of the defender team is usually located.
From Coast, you can reach a few underestimated locations.

The ground level of Comms can be amazing to attack Rooftop and the portion of the road immediately below it.
As long as your team is fighting in front of you, the enemies shouldn’t notice your presence; or at least have no time to deal with it. There is also a health pack in the room.


The high ground of Comms gives access to the same locations, and there is a handy box for cover.
Sometimes there are enemies on this roof.
Beware of possible Widowmakers attacking you from Pass.
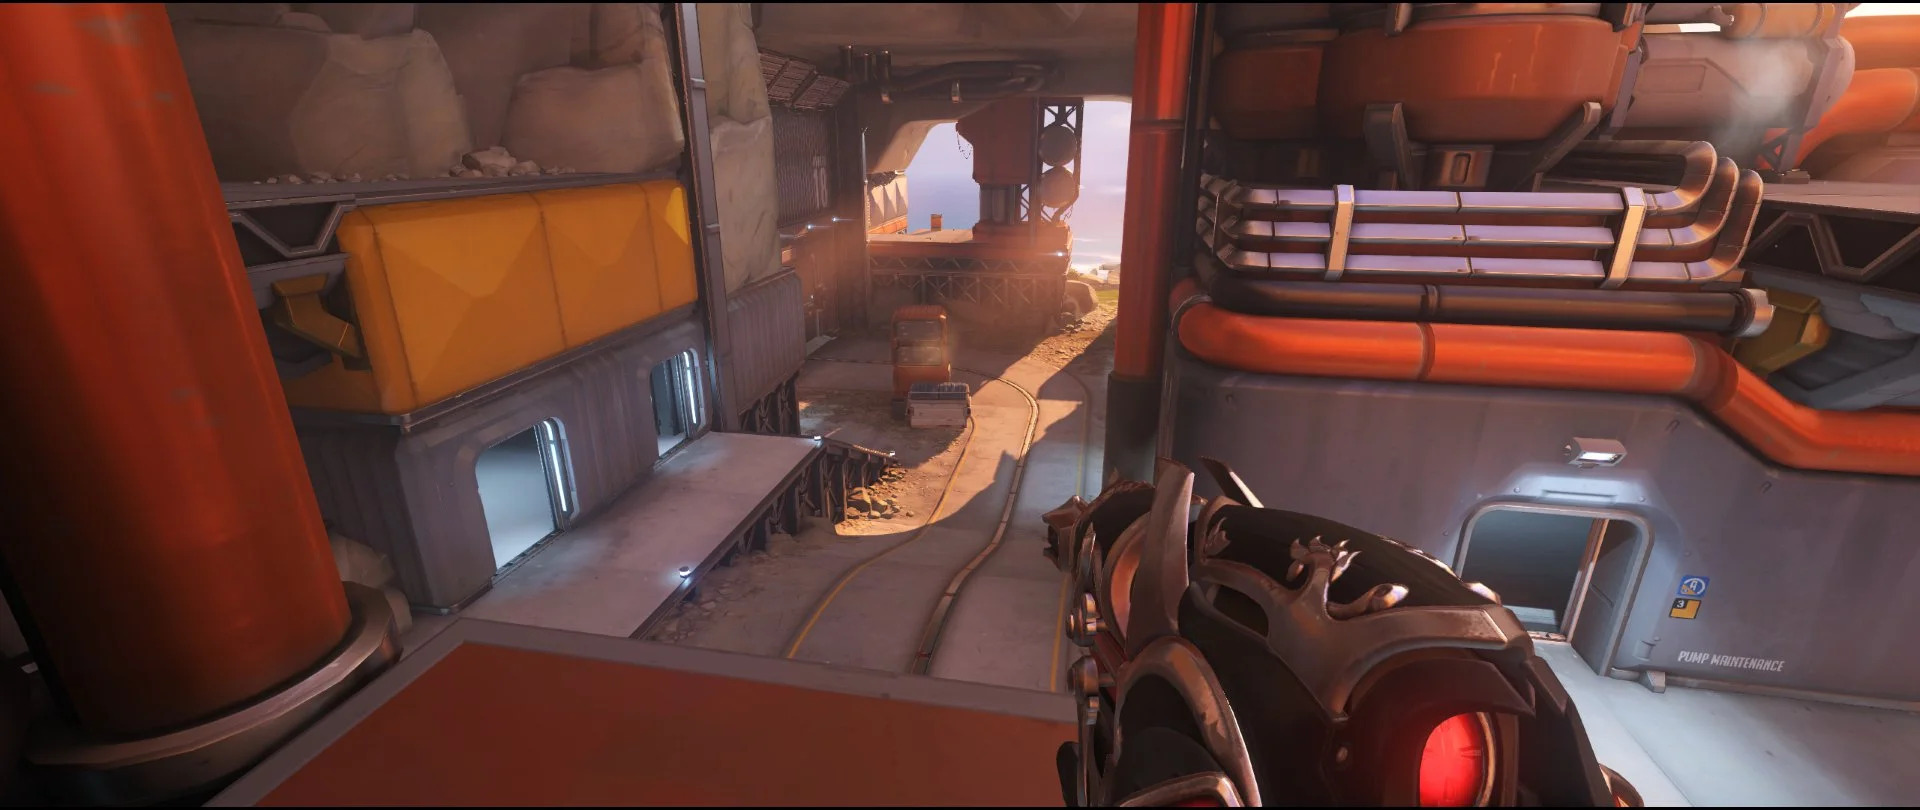
On your left there is Tower (image 3), which gives a perfect field of view on almost all the defensive positions. It is great to slaughter a few opponents, but you are also an easy target once spotted.


At the end of Coast there is Long. It gives you access to similar locations, and if spotted you can just grapple to Comms and withdraw quickly.
This is the field of view from Pass. The view from this spot is great, but you are also a very visible target - use it only if your team is playing aggressively.
You can take part in the battle also on the ground level of Pit, but I do not recommend this approach because there are better placements on the high ground.


Overlook provides a perfect view on the road and on a portion of Catwalk. You can kill the opponents while your team is pushing the payload past the slope.


Once the fight moves, relocate on Perch to gain a view on the final section of the first point. You literally have access to any position, but beware of the opponents as they all expect a Widowmaker or a Junkrat on this high ground.


Situationally, you can opt for a more aggressive approach jumping on Catwalk. Consider it a sort of flanking route as you can attack the enemies from their back while using the boxes for cover.
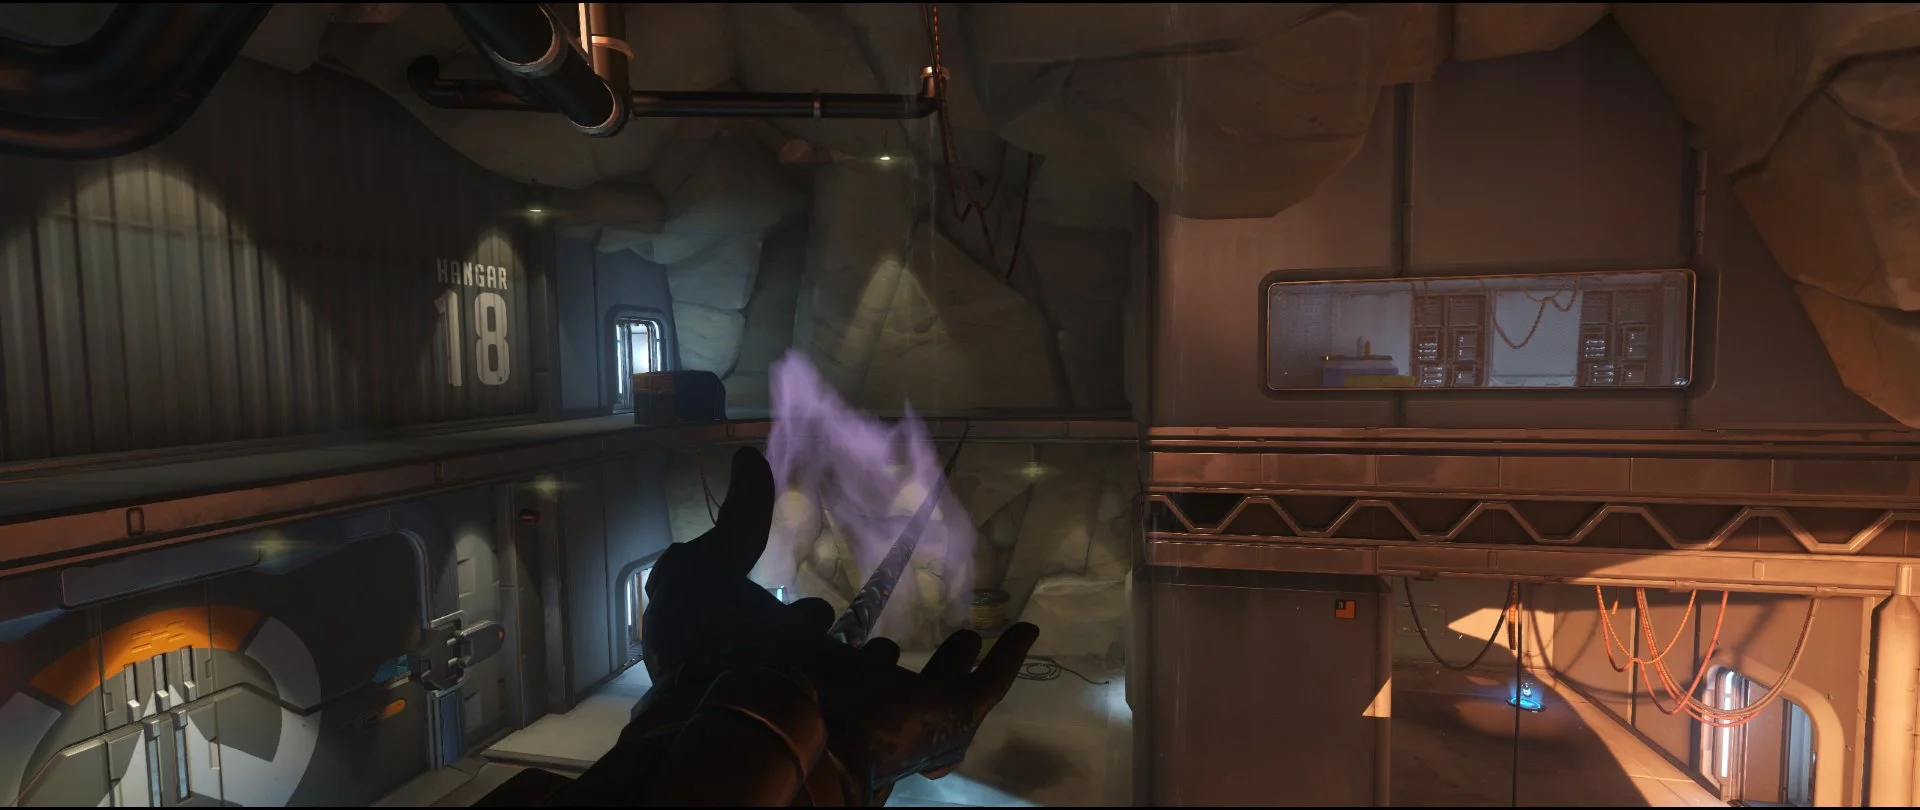
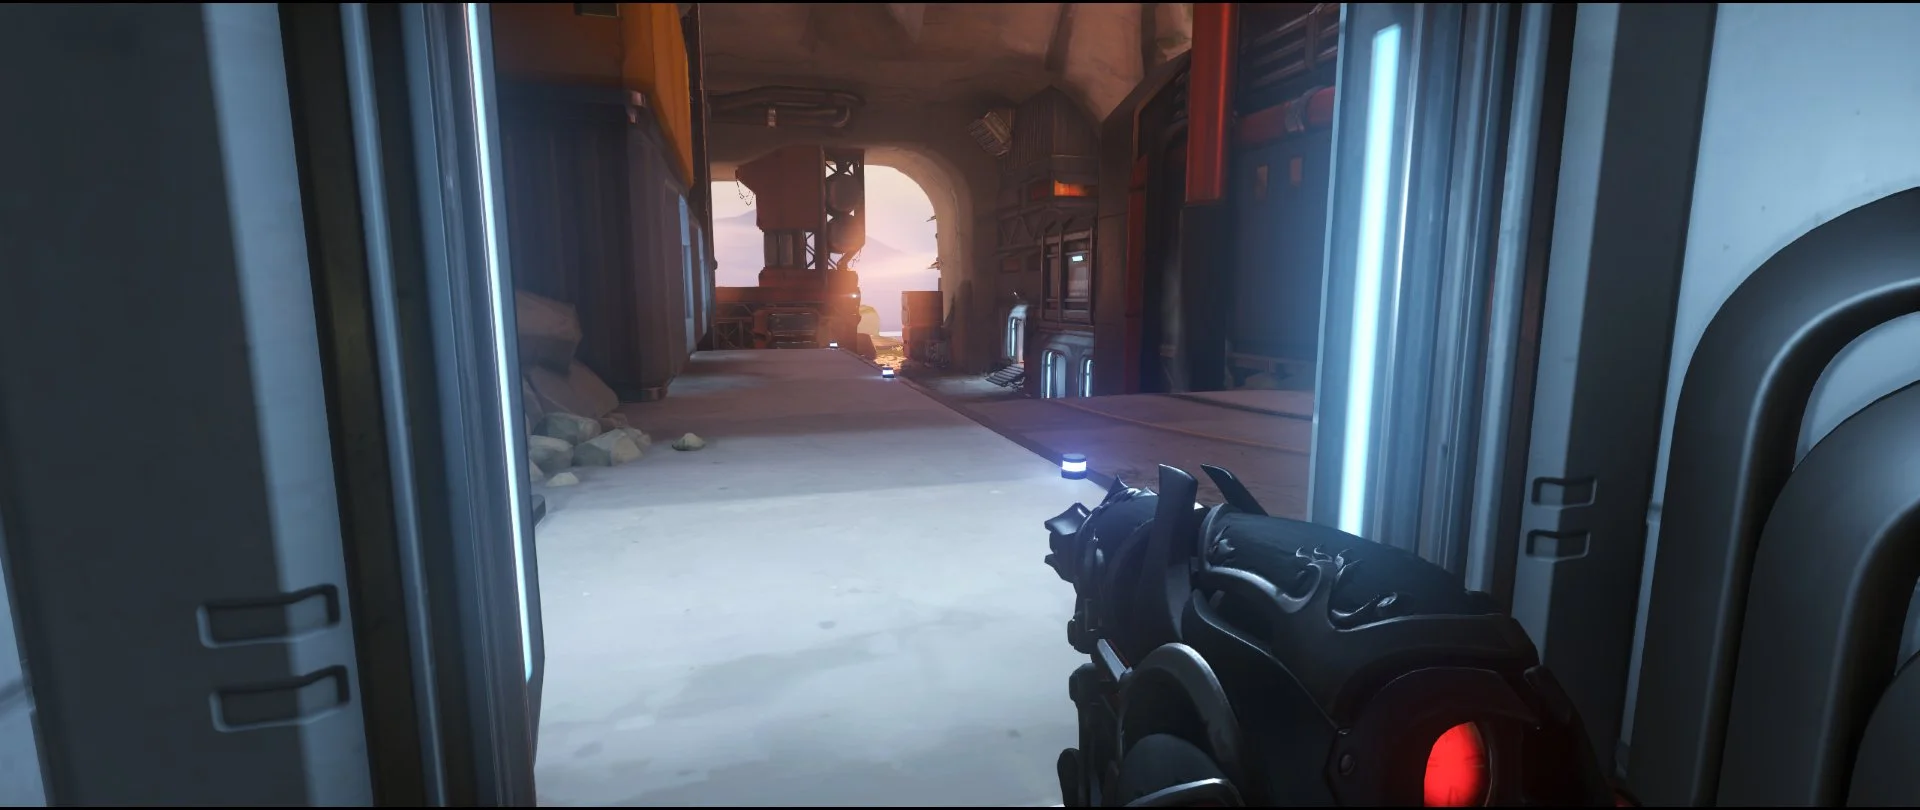
You can also advance to the next section and attack them as soon as they exit from the spawn (image 4).


On the ground level, Mainframe is an excellent placement. Use the servers for cover while contributing to the battle on the point.
The big health pack will save your life countless times.
On the right side there is also a staircase that leads to Catwalk.
First Point - Defense
Pass is useful to score a few kills at the start of the match.
Do not overextend on this placement.
Once in a while you can come back here to kill an opponent in the rear lines.


Usually, there is a shield tank on Rooftop, so you can exploit him to attack the enemy team from a safe position.
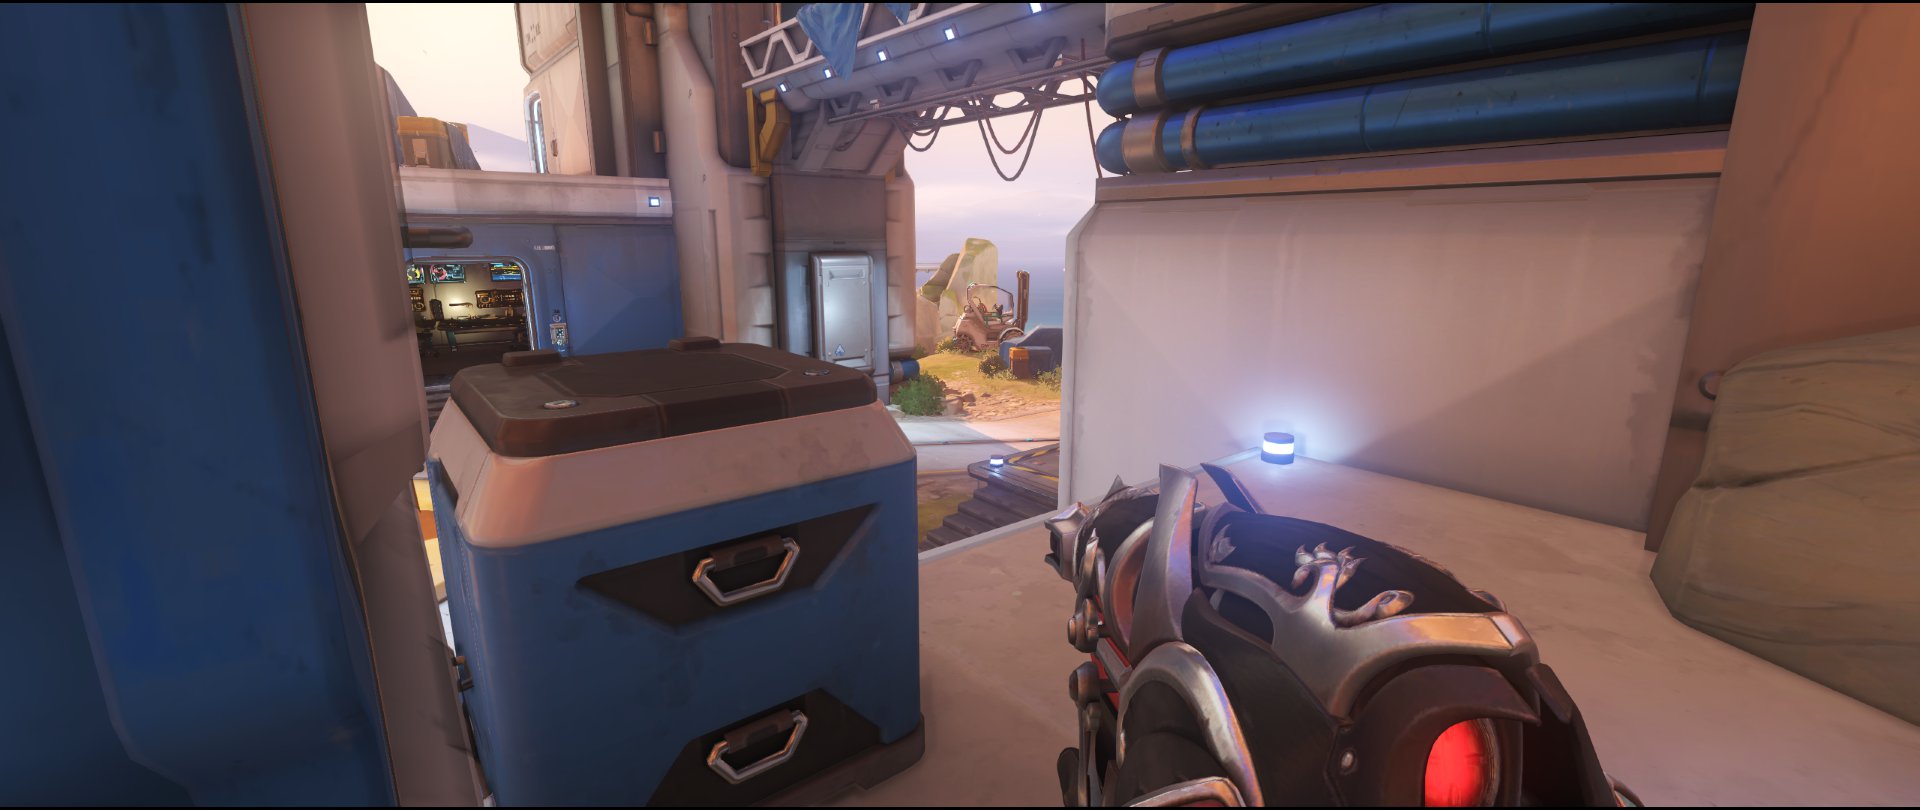
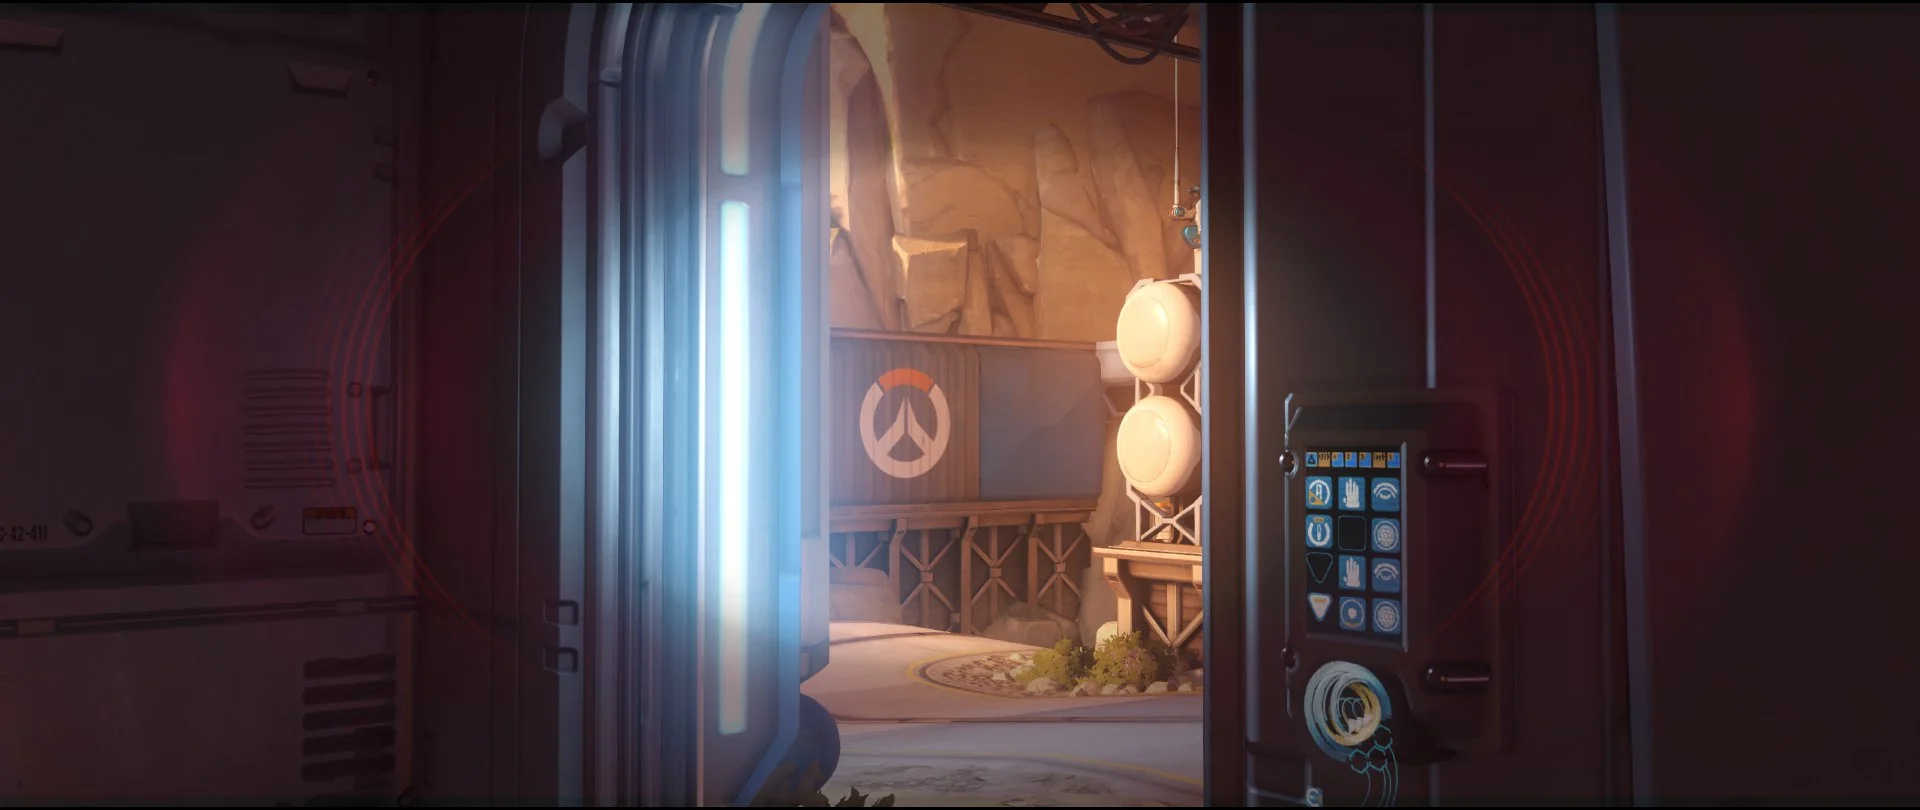
Alternatively, use the blue boxes (images 2 and 3) to defend the road while hiding most of your body.


On the right side of Globe, you can exploit this small edge for a surprise attack on the road.
Beware of flankers on the right side, and do not stay in this position for too long.


Overlook is certainly the best high ground position on this area of the map. You have an excellent view on the road and some height advantage to fight against the attackers jumping on Rooftop.
On your back there is Perch (image 2 and 3). It is perfect to deal with long-range heroes on Pass and Long.


Globe is a possible but rarely used location because you are too exposed.
It may be used for a few kills, and you can hide behind the antenna (image 3) while attacking the adversaries rushing out of their spawn. Be very careful against the flankers on Long (image 4).


On the final section of the point, Catwalk is your best placement as it gives you access to the whole area.
From the very left (image 1), you are even able to shoot at the enemies advancing through Pit.


Above, I have spotlighted all the possible spots on the ground level. They do their job, and there are some structures and elements of the map you can use for cover.
They are particularly useful to deal with the opponents on Overlook and Rooftop.
There is also a health pack nearby.
Second Point - Attack


From Long, you have vision on the whole area before the Shuttle and even on a portion of the point (image 2), so you can contribute to the fight from a long distance.


Alternatively, Short is equally good - you must learn to use both the positions in your games to avoid being countered.


Afterwards, jump on Shuttle. This is the focal location of the point both for the defenders and the attackers.
The boxes next to Perch are great to deal with the opponents entering from Platform, and moving forward you can also achieve a good view on the main point.


On the right side of Shuttle we find another high ground: Pass. It gives an excellent view on the whole point.
Furthermore, you can enter inside Access and cover both the point and the entrance on Platform while using the door for cover.


Finally, above I showed the view from the very top of Shuttle (left, mid, and right side). You have access to all the entrance and to almost any location around the point.
Second Point - Defense
This is your field of view from Shuttle. You literally have access to all the entrances on the point and to the whole area below. Controlling this location brings a huge advantage to the team.


On the right side of Shuttle we find Perch. In the images you can see your view from the box and from the platform.
Go through Shuttle to switch on the other high ground.


Pass is also an amazing spot, and provides a convenient vision on the whole area.
In both the locations highlighted so far, beware of the long-range heroes on Short and Long. You can usually deal with them while using the inner area of Shuttle for cover (image 1).


Entering inside access gives you another possible spot. Your vision is limited to a single section of the road, but the placement works very well while your team is contesting the payload in this zone.


Platform is the only high ground location you can use on the final section of the point. It does its job, but all the enemies will check this placement first, so I suggest using the ground level ones.


Boiler is a “sneaky” spot to attack the opponents while they are focused against your teammates on the point.


I have showcased all the possible placements on the ground level. There are several elements of the map, pillars, and boxes you can use to hide your body while attacking both the high grounds and the main road.
Third Point - Attack


Pipeline is a basic but efficient position in the first section of the road. You have access to the whole ground level and to several high ground positions.


Next to Pipeline, this structure makes you almost invisible, and gives access to a few critical spots:
Widowmaker’s placement on Fuel
The top of the road
The ground area on the right and the first door of Fuel


The road is visible also from Coast, and you have vision on Courtyard, where most Widowmaker players are usually placed on defense.


These boxes on the road are also a potential location as they provide a solid cover thanks to their height.


In the first image I am inside Loop, while in the third I advanced into Closet. Both these positions on the ground level are viable and give you vision on Courtyard.
The last picture showcases Rooftop, which grants a bigger field of view on the already-mentioned areas. In this position you are vulnerable to heroes who can jump past Fence (such as Pharah, Widowmaker, Junkrat).
Courtyard is the best location on the whole situation.


Most Widowmakers just camp the high ground of Courtyard as it grants vision on the entire road and on the point. You could literally stay here for almost all battle and keep sniping players from this very safe distance.
Using your Grappling Hook (image 2) it is easy to reach Pass, and eventually you can go back and forth depending on the enemy’s reaction.
Pass provides a complete view on the point and on the two exits from the defenders’ spawn. You can also hide next to the door on your right for some cover (image 4).


On this point, all the placements on the ground level are not as good as the high ground ones, but sometimes you will need to relocate to confuse the opponents.
The two images above show your field of view from Courtyard: the first on the left side and the second on the right one.


Continuing on your right, enter inside Fuel, and use the two doors as extra spots (images 2 and 3).
Connector (image 4) is the last ground level position available.
These placements do not provide an amazing field of view, but you can still use them situationally.
Third Point - Defense


We will have a look at all the high ground placements used to defend the road.
In the first image, I am on Rooftop, which is useful at the start of the battle for a few kills - particularly if your team is still contesting the payload at the choke.
Afterwards, Courtyard is certainly the most used location (image 2), but many Widowmakers also love Fuel (image 3).
Pass is also a viable and more defensive spot, but generally you will use it only once the payload is pushed near the slope.
All the positions illustrated above work great, and you can freely rotate among them depending on the enemy’s behaviour.


Using your Grappling Hook from Pass, you can reach this small “secret” location.
Your vision is very limited, but it is amazing for a few kills against the right targets: for example, a Widowmaker hidden behind the boxes or a support running out of the spawn.

On the ground level, this is your view from the doors of Fuel. These spots are not amazing if compared to the high ground ones, but can still do their job.
Once the payload is past the choke, you will mostly exploit the area around Launch.


In the pictures above, you can see the field of view from the left, top, and right side of Launch. Generally, the left and the right side provide a good cover, but you will still have to deal with flankers as the area is quite small and open.


At the very left, this semi-hidden zone is perfect to attack the opponents from a long distance, and there is also a small health pack at your disposal.


Finally, the area next to the left-exit has a few spots and boxes that can be used for cover.