
The best sniping spots for Widowmaker on Eichenwalde

The sniping spots on Eichenwalde that all beginner and intermediate Widowmaker players should know. Learn the best places to contribute to the battle.
Check out all the articles in my series about the best sniping spots for Widowmaker:
Hybrid Maps
Assault Maps
Escort Maps
Aim is important, but positioning is the key to victory. As a sniper, having a good aim is indispensable, but knowing the positions from where to shoot without being seen makes the difference between life and death. I analyzed streams, videos, and pros gameplay to compile a list of the best and most used sniping spots.
Positioning when pushing, flanking, and in teamfight. We will have a look at the best placements to push, defend, take part in teamfight, and predict the movements of the enemy Widowmaker - both on offense and defense.
No Grapple shots. A Grapple shot is a scoped headshot performed in mid-air, using Grappling Hook to reach max height and “fly” momentarily. This article is thought for new or intermediate players, and I consider Grapple shots a mechanic for advanced ones. I might prepare a guide on them in the future.
Widowmaker duels. Depending on the situation, bodyshots and a correct use of your SMG (often underestimated) may be crucial, but when facing another Widowmaker you should always attempt to headshot her. We will study the best places to kill her while remaining concealed.
Keep moving. Thanks to Grappling Hook, Widowmaker is a relatively mobile hero - you should exploit this strength to rotate the spots and escape from flankers. Relying too much on the same location could be your ruin.
Note: even if I have explained some placements only from the perspective of the defenders or the attackers, you can use several of them for both purposes.
While explaining the spots, I might use some map callouts: List of all map callouts, and credit to their creators.
Beware from mobile. All pictures are optimized, but there are about 100 on this page.
First Point - Attack


Let’s start with a few general spots used to take part in the battle near the main choke.
In the first picture, Widowmaker is positioned in the house at the opposite side of the bridge. It is one of the most used locations at the start of the match as it grants you both a good view on the choke and safety behind the walls.
The second placement on the main road is a bit risky if there are heroes such as Junkrat spamming grenades towards your position. The third one is perfect to gain access to the right side of the choke. Use the flower pot for cover, but beware of attacks from above the bridge.


The building on the right side of the bridge is useful when the team is advancing towards the point, and from here you can kill the enemy Widowmaker on the high ground of Lodge.
Afterwards, move on the stairs or use the destroyed robot for cover. This is an excellent placement while the squads are contesting the point.

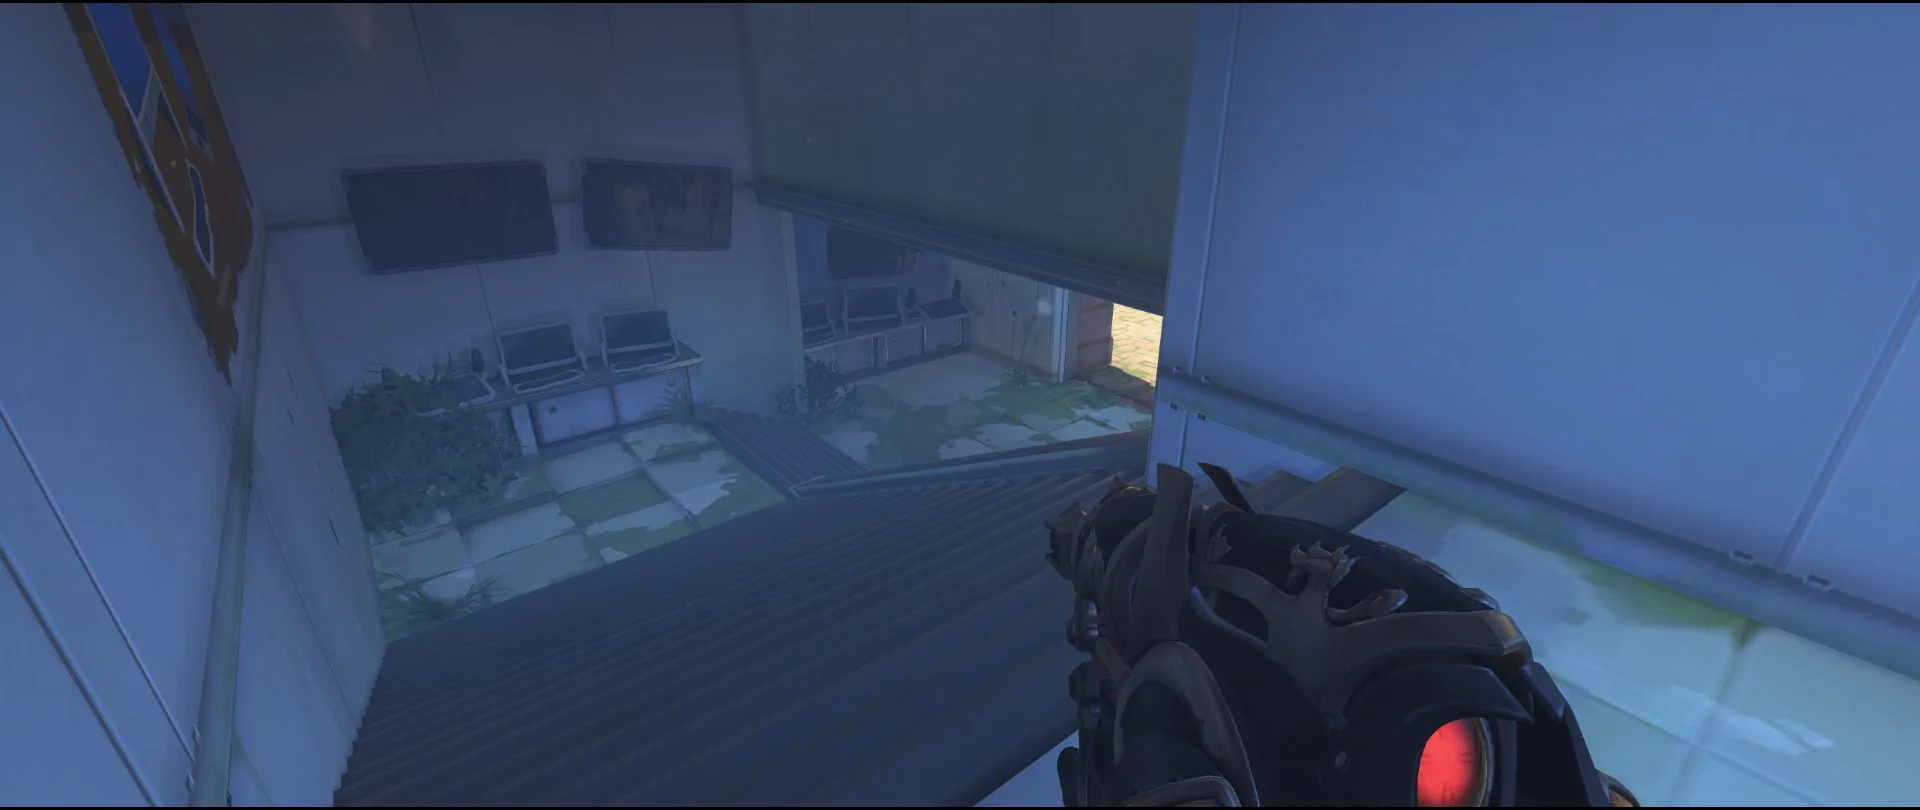


Grapple to the bridge to gain high ground superiority, which is particularly useful when your team is pushing past the choke. Beware of possible flankers from the room on your left.
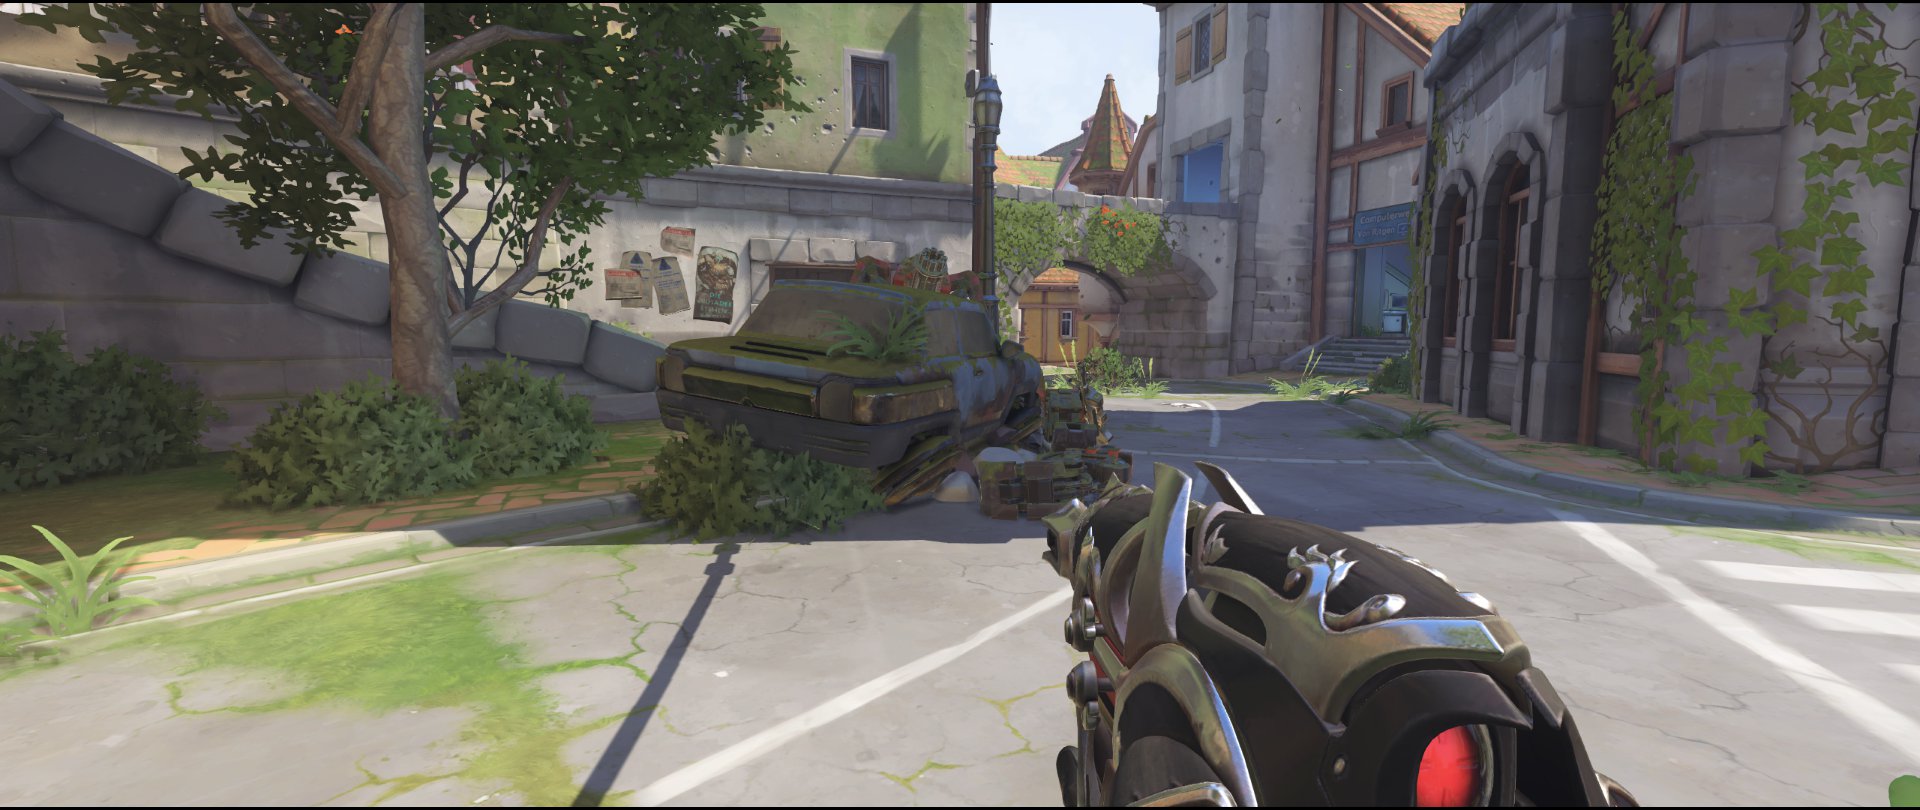
The ground level of this building is a safe placement once the battle explodes on the point, and from here you can move to more advanced positions, such as the tank in front of you.


On the left, exploit the wall next to Alley for cover - a perfect spot to snipe any opponent camping on Lodge.
Follow the road on the back to appear right next to the point. This is a very dangerous flanking route, but from here you can shoot at any opponent rushing from the spawn via the door in front of you.
First Point - Defense
The bridge can be used for a kill at the start of the match. There are also more placements near the attackers’ spawn, but they are potentially dangerous, while the bridge offers you a quick escape route.
Camping this area for long is not recommended, but you may come back here once in a while, snipe a support, and retreat in a safer position.


On the left side, exploit the car for cover while attacking the heroes at the choke. If the enemy team pushes or dives, just retreat slightly behind (image 4) and deal with them.


The tower is also a prime sniping spot on this first area. The dead tank (image 4) provides a good cover and vision on the left side of the choke - not many opponents will expect an attack from this position. Your silhouette is also partially covered.


The Lodge is certainly the best placement for Widowmaker on defense. You have access to the entire area, and heroes without mobility will require some time to reach you.
The place on the ground level (image 1) is weaker, but it might save your day when you are focused constantly by many long-range attackers.
Second Point - Attack


You won’t use these windows a lot, but they can be effective to deal with nasty heroes camping the high ground on the castle walls.


On the right side of the main gate, you can use this entire area near the staircase while your team is pushing the payload on the first section of the road. There isn’t a lot to explain, just beware of the opponents placed on the high ground as they can counter this placement easily.


On the left side of the gate, there are narrow chambers that provide cover and can be used for a few shots. Above them, this high ground area is optimal to cover the second segment of the main road.


As the attacker, the castle walls are the best place from where to fight while you team is on the final area of the second point.
In the images above, you are on the platform at the very edge of the walls. You have a complete vision on the entire point and on all the possible entrances from the defenders’ spawn.


In the first picture you are right below the platform, and in the second on the mid-section of the walls. They are all great locations for any long-range attacker.


There are placements available also at ground level, but honestly you will prefer these to the high ground ones only in rare cases. Use the elements of the map (tree, bushes, robots) for some cover and to hide your body.


Finally, you can also flank the opponents via the room (image 1) and the space (image 2) at the right-side of the castle walls. These positions work for a couple of quick kills, but are very dangerous, so you should relocate as soon as possible.
Second Point - Defense
On the castle walls there are many great spots for Widowmaker and long-range attackers in general.


The big tower gives you high ground superiority on the opponents, and from here you can even snipe the heroes coming out of the attackers’ spawn (image 3).


Slightly to the right, this opening into the walls gives you access to the same area below.


Finally, at the edge of the walls there is the most popular placement in this section of the map. You have vision on the entire area below, and can easily deal with the Pharahs flying over the main gate.
You can fight both from the castle walls and the platform (images 3 and 4). The latter is, of course, the best placement, so you should exploit it as much as possible.


These spots on the ground level are subpar if compared to the previous positions, but are still viable depending on the situation. The wall offers a good cover, and you have a solid view on the road.


In the second section of the point, you might use the ex-defenders’ spawn (image 1) while the enemy team is pushing the payload.
The back of the bridge is also an appropriate situational location depending on the movements of the opponents, especially if the payload is stuck on the bridge.


These platforms are the best placements in this area as they give you access to literally the entire road and the castle walls. Use them whenever possible!
As the defender, it is rather unsafe to stay on the castle walls when the battle is taking place near the point, but sometimes you will have the chance to flank the opponents pushing the payload.
Note: this map is very open, so you should be careful about the placement of the enemy Widowmaker. You can spot each other from literally any location.
Third Point - Attack


On Stage, use these two shelves for protection while fighting the enemies on the main road.
Ramp is an even better placement, especially if you stay next to the pillar at your left. There is also a small health pack nearby.


Moving forward, fighting from the road isn't the safest option, but you can jump on the first chandelier above you using the Grappling Hook. It works well if there are no mobile heroes able to push you away. Avoid the second chandelier as it is too near to the enemy lines - almost everyone would be able to attack you.


Staying on the stairs is generally safer, and you can attack from either the right (image 1) or left side (image 2).


Via the hallway on left, you are even able to flank the opponents, which is helpful if your team has problems pushing the payload past the first section of the road.


All the high ground placements available on this area of the map. Honestly, they are more useful for the defenders than the attackers, but depending on the situation you might exploit them as well.
From the high grounds on the left and the right (images 1 and 2) you have a solid view on the point and on the doors used to exit from the enemy’s spawn, so you might be able to snipe some players.
In the third image, you are on Throne. If used at the right time, this spot will cause chaos in the enemy lines as they won’t expect an attack from this position.
Third Point - Defense


Ramp and the old spawn are the best places to defend the first area of the map. The former covers pretty much all the entrances, while the latter is quite safe and grants you vision on the main gate.


Gallery is universally considered the best placement for Widowmaker on the third point. You do not have only a full view on the road, but from here you can also reach several more positions.
For example, following the hallway on your back you will find another useful spot (image 3) to cover the main road. There is also a big health pack nearby (image 4).


Simply use the Grappling Hook to move on the other high grounds. You should switch position constantly once the payload reaches the final section of the main road, and these quick escape routes will save your life countless times.


Basic placements on the ground level just outside the spawn. The first two are on the left, and the other two on the right. Use the pillars for protection.


Finally, you can place yourself also at the very back of the room. Your visibility is reduced drasically, but the flankers will have a very hard time reaching this placement. Still, I do not recommend it unless you are having huge survivability issues.
-
Why MDA? The pursuit of a Game Design Ontology
Author: Rogerio Candido da Silva Junior
Institution: University of Beira Interior
Data Utilized: The master's thesis references an Esports Tales guide focusing on competitive Overwatch level design, specifically citing the article "The Best Sniping Spots For Widowmaker On Eichenwalde".
Full Text: Available via the uBibliorum | Repositório Institucional da Universidade da Beira Interior.
Vincenzo is an esports analyst, publisher, and writer with over a decade of industry experience. Formerly the head editor for Natus Vincere (NaVi), he has produced content for a wide range of gaming platforms, including DreamHack, DOTAFire, 2P, and FACEIT.
His comprehensive esports research and competitive data are globally recognized and regularly featured in academic and industry studies. Learn more about his background on the About Us page.